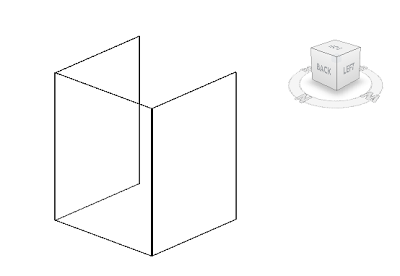
"I have a vestibule with 3 walls built as curtain walls. I have a family built for a set of double glass doors as: curtain wall-storefront-dbl and saved in the doors family folder. This door family is not available as a door type and cannot be inserted in a wall. How do I get the curtain wall doors to insert into the curtain wall storefront opening?"
This is a common question when working with curtain wall doors and arises because, in Revit, curtain walls treat doors differently than walls treat doors. When adding a door to a normal wall you choose the door type, place your cursor over the wall, then click to place the door in the proper location and create the opening at the same time. When working with curtain walls, the steps are a bit different because the curtain walls see the door as if it is a panel rather than a door. This is also why regular doors and curtain wall doors are not interchangeable. To add a CW door into a CW you need to partition the wall first and then replace an existing panel with a curtain wall door.
Here's how:
First off, you'll need to load the curtain wall door into the project:
1) From the Insert tab, click the Load Family button in the Load from Library panel
2) Navigate to the folder where the curtain wall door family file (.rfa) is located.
3) Select the file then click Open.
To add a curtain wall door to a curtain wall object, follow these steps:
2) Partition it using the Curtain Grid tool from the Home tab > Build panel.
3) Hit Esc to exit the Curtain Grid tool then place your cursor over one edge of the panel that you want to replace with a curtain wall door. Tap the Tab key until the panel perimeter highlights then click it to select the panel.
4) With the panel highlighted, click the drop-down in the Properties panel and select the curtain wall door type that you want to replace the panel with.
The door replaces the panel and conforms to the size defined by the curtain grids.
As you can see, adding curtain wall doors to curtain walls is a straightforward process in Revit; it's just different than the technique used to add normal doors to normal walls. If there are other questions out there, feel free to ask.


If you replace the panel in that bay of the curtain wall with a wall, then you can insert a regular door in the wall. This works even if the door fills the entire wall. To prevent this wall from throwing your wall schedule areas off, leave its "Categorize as" parameter set to the default Panel.
ReplyDeletergesner,
ReplyDeleteThat's a good tip.
The only concerns that I would have using this method would be:
1) The connections at the mullions. Most curtain wall doors tie into the adjacent mullions to maintain the water/air continuity of the system. With the door being designed to mesh with the CW, I'm not sure of the benefits of creating the family as a standard door rather than curtain wall door? It also seems that this method would interject an additional layer into the system (Curtain Wall > Wall > Door), that may not be required by using the Curtain Wall > Curtain Wall Door method. Any thoughts?
2) Scheduling the doors. If the curtain wall portion of the model is created by the Architect, then the CW doors may get buried in the door schedule with the other doors in the building. If it is created by a curtain wall consultant, there will usually be a schedule specifically for the CW portion of the construction document.
3) Scheduling the walls. Whether it is scheduled as a wall or a panel, the wall inside the curtain wall is going to show up somewhere and needs to be ignored.
Please email me if you'd like to share an example of your method and we'll put it in an upcoming post.
Thanks,
Jon