Revit’s curtain wall tool is great in the fact that the
actual glass/panel size interactively adapts to the size and configuration of
the surrounding mullions. Wherever the curtainwall profile’s shape crosses the Center
Front/Back reference plane, in the Profile-Mullion family, the panel is
terminated. That is a great solution
when there is only a lite of glass or a panel surrounded by the mullions, but
what do you do when a curtain wall panel includes a shadow box or
insulation? Those elements often don’t
match the same extents that the glass or panel (see below) and may vary with
the mullion conditions.
Should a shadow box be created as a generic object as
inserted separately? That may be a
viable solution, but it could also be time consuming. This tutorial explains a method of
incorporating the shadow box into the panel family and adding parameters to
control the perimeter offsets.
2. For this exercise, we’ll use a 1” monolithic glass element,
but this can be as complex and detailed as you like. Use the Extrusion tool and create a 1” thick
rectangle in the Floor Plan view. While still in the Create Extrusion mode
dimension the thickness and lock the dimension then click the Finish Edit Mode
tool in the Modify | Create Extrusion panel.
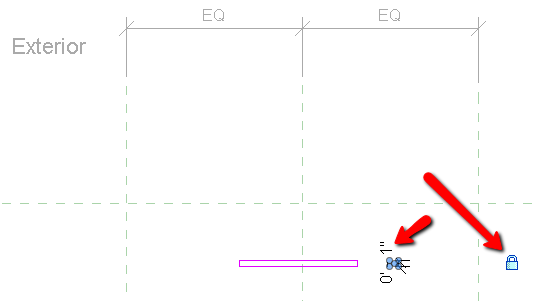

3. Drag the left, right, and front grips to the
corresponding reference planes and lock them.
This ensures that the glass maintains a constant thickness and flexes to
match the extents created by the vertical mullions.
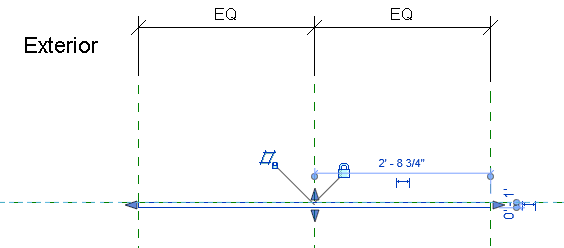

4. In the Exterior elevation view, drag the top and bottom
grips to the corresponding reference planes and lock them as well. This ensures that the glass flexes to match
the extents created by the horizontal mullions.
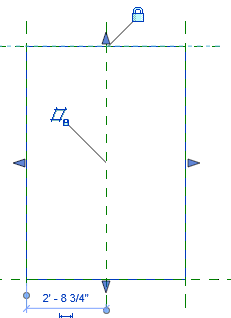
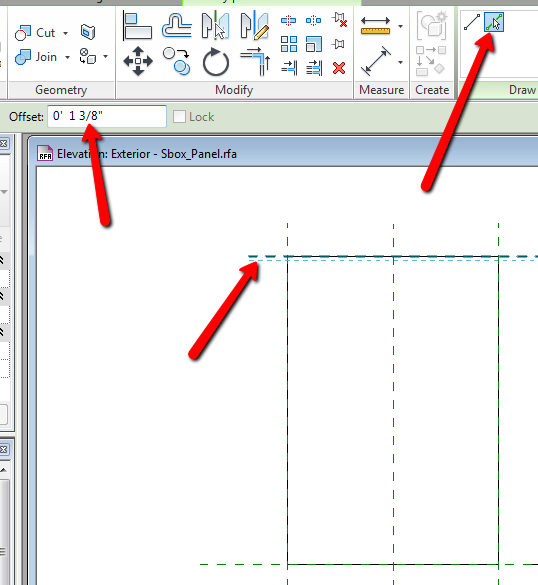
5. We are going to set the initial offset distance for the shadowbox at 1 3/8” on the top and bottom and 1 1/2” on the sides. These will be adjustable through the use of parameters. Start by creating offset copies of the existing reference planes inward, as described. This is done a bit differently than the procedure used to offset lines. Instead of using the Offset tool, click Create > Reference plane from the Ribbon, click the Pick Lines icon, enter the Offset value, then hover over the existing reference plane, slightly inward until you see the ghosted ref plane to be created, then click.
6. Dimension the distances from the original reference planes to the offset reference planes but do not lock the dimensions.
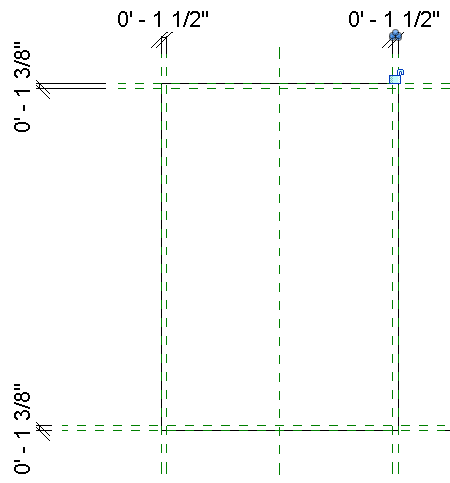
7. Select one of the dimensions, click the Label drop down menu and choose <Add parameter>.
8. In the Parameter Properties dialog box that opens, choose Family Parameter, enter a descriptive name, select Instance (so the value can change for each infill occurrence as needed) and select a group that the parameter will appear in, and then click OK.

11. In the Floor Plan view, create a rectangular
extrusion within the offset reference planes and behind the glass – this is the
shadowbox panel. While still in the Create Extrusion mode, dimension the thickness
of the panel and lock the dimension. Click the Finish Edit Mode icon when you
are done.
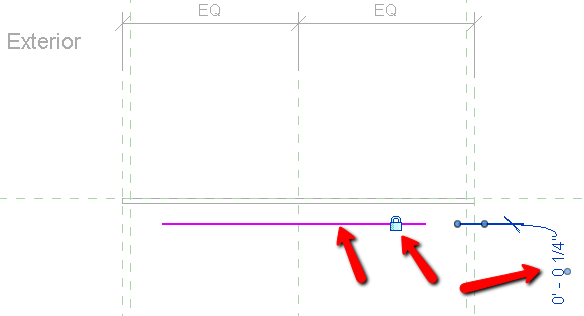
12. Add a dimension from the Front reference plane to the front face of the panel and adjust the dimension as required. If necessary, this could also be a parameter driven distance if it may vary over the course of the project.
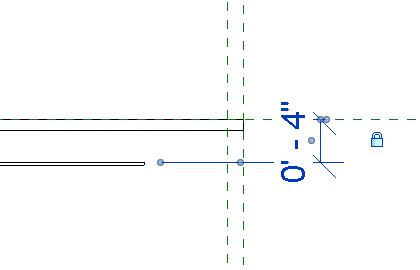
13. In the Front view, select the panel, drag the grips to each of their respective offset reference plans and lock them.
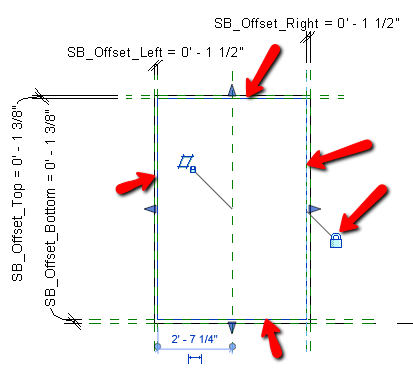
14. Save the family then load it into a project containing a curtain wall then replace some existing panels with the new panel. Note how the shadow box panel may not align properly with the sides of the mullions.
15 Select one of the panels and the parameters that were created appear in the Properties panel. Select and adjust the parameters as required.
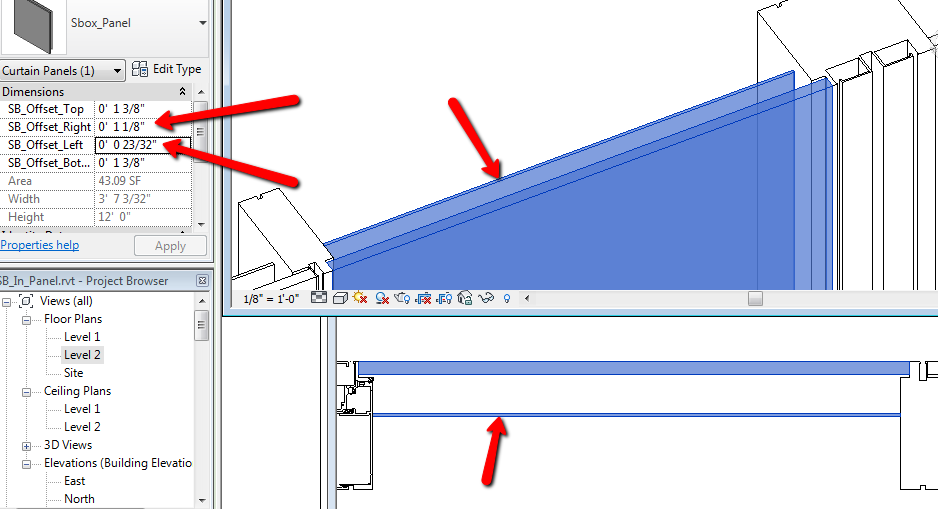
As you can see, creating adjustable shadow boxes as
components of curtainwall panels is a simple and straightforward procedure and a similar procedure would be used to incorporate insulation into the panel family. By
investing a little prep time, you could save a good amount of labor down the
road.


Great blog for a wonderful topic. I have a few more topics for you to delve into if you have the time:
ReplyDelete- Creating adjustable corner mullions for different angles.
- Creating adjustable sliding door panels (with equal panel widths that don't break down). Also allowing for automatic door opener.
- Using CW doors in door a legend.
Thanks,
Quite an informative post. Thank you for sharing. If you need any further information on curtain walls contact us! We are the leading manufacturers of various types of curtain walls suiting our clients preferences and have handled numerous projects successfully. http://www.impala.co.ke/
ReplyDeleteشركة تنظيف بينبع
ReplyDeleteتنظيف مسابح بالقصيم
تنظيف مكيفات بالقصيم
تنظيف كنب بالقصيم
تنظيف سجاد بالقصيم
تنظيف خزانات بالقصيم
شركة تنظيف خزانات بالقطيف
تنظيف بجدة
كشف تسربات المياه بالقصيم
كشف تسربات المياه بالخبر
Veryy creative post
ReplyDelete