
Data Mining Your Revit Model
Revit is Database software that uses graphics and geometry as
part of its system. This leads to a very
data rich model file. There are a
variety of different ways to get useful data from the Revit Model. Revit can automatically schedule many
elements of the model. Revit can also do
material take-offs of most elements that exist in the model. Furthermore, Revit is also able to get useful
information from reportable model data that doesn’t actually exist in the
model.
There is information in the model that can be translated to
provide different information that is useful to the manufacturer. For example;
if I have the perimeter of a Curtain Wall Panel, then I can use that information
to figure the length of gasket material or amount of adhesion material, and so on.
If we know how many fasteners it takes for the different mullion types
and assemblies, we can add a parameter to
include X amount of fasteners to each of the types. That information would only
need to be added per type. Then we can
Schedule that information in the Curtain Wall Mullion Schedule.
Curtain Wall Panel take-offs do not automatically give
perimeter information. The following
demonstrates how to mine your Revit model for useful information. In this case we schedule the perimeter of the
curtain wall panels.
Using Revit 2016 (This can also be done in earlier and
later versions of Revit. Different year releases might not look
identical.)
Step
One
Click “View” then “Scheduled” then “Material Takeoff”.

Step
Two
Select “Curtain Panels” from the “Category “ list.
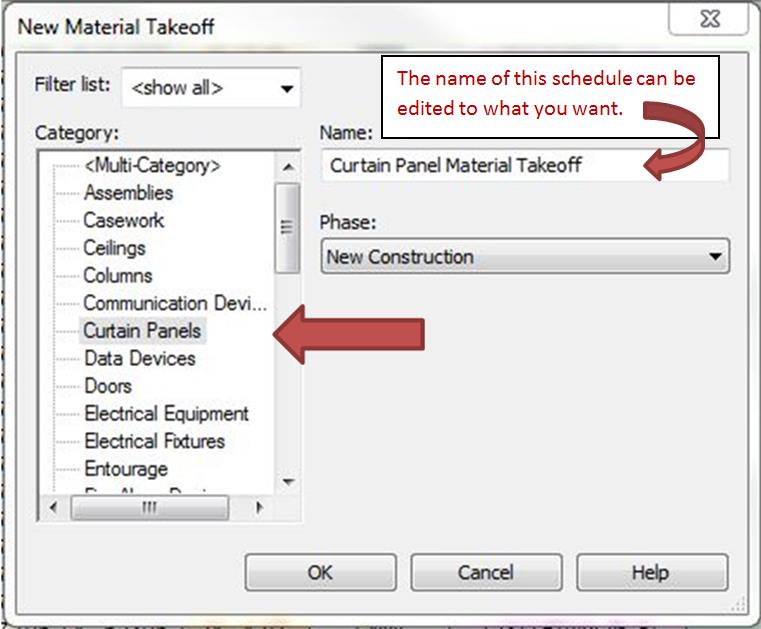
Select “OK”
Step
Three
Add the
fields that you want to schedule.
Be sure to include “Height” and “Width”.
You will need them later to get the perimeter. The “Family” and “Material Area” will also be
useful for keeping track of types and ordering material.

Step Four
Select “Calculated Value”. Name it “Perimeter”. Set Discipline to “Common”, and Type to
“Length”.
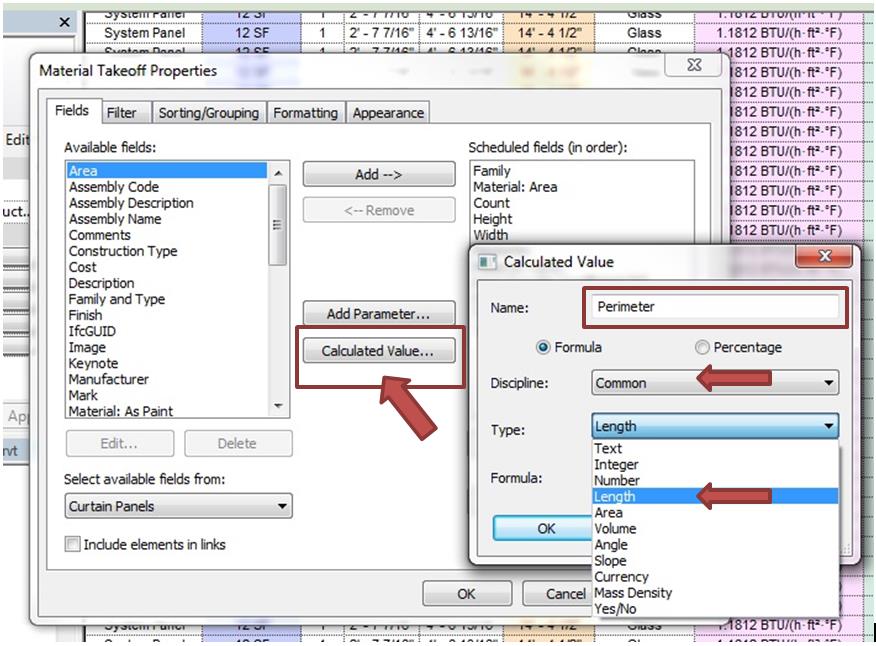

In the “Formula” area click the "three dot" button.
There you will see the parameters that can be used in a formula and are
in the current scheduled fields. First
choose “Height” or “Width”. Then choose
the other. You can pick one at a time or just type in the formula by hand. Be sure to match the text exactly or Revit
won’t recognize it. To get the perimeter
you can use a few different formulas that will get the same result. I use (Width + Height) * 2. These formulas work like an Excel formula.

Edit the “Formula” field to show the calculation that you
want.

Select “OK.”
Step Five
Once
the fields are set, it’s time to determine how to show the desired data. Sorting helps to arrange
the data in a very useful spreadsheet layout. Select the Sorting/Grouping tab to
arrange the data for the spreadsheet.
Under the "Sort by:" pull down menu select Family and select the
options you would like to use. It is important to check the box for “Footer”
and “Grand Totals”. Whether everything
needs itemized or not is up to you.

Step
Six

Bonus
Step
Sometimes we need lengths or areas in a different unit of
measure for special circumstances. Revit
can easily deliver the information that you need in any of the formats that you
see in the image below. In the “Field
Format” you can get this information in either Imperial
or Metric.

Scheduling these factors is very useful for the folks
involved in the project. Area can be
used for ordering material like glazing or coatings. Width can be used to find
the longest span for the structural folks. Perimeter can be used for ordering
material like gaskets or adhesion material.


Once we think through the
list of data that our manufacturers may need we can come up with a way to mine
that information from our Revit “Database” Model. We can get most of what we need from
Scheduling the Curtain Wall Panels or Mullions.
I invite your questions or
comments.
Hi,
ReplyDeleteIs there any way to add parameters to Curtain wall mullions? For example, a text parameter to indicate some small technical detail? Or a yes/no parameter that says if the mullion needs to be ordered from a specific manufacturer?
Thanks for your help!
Yes. There are ways to do what you are asking about. I think to get those things to be schedulable, you have to be carful of where you put the information and how much you try to do with one family. If you make different family files with the differing Parameter information, it should work. I think that if you try to make one or a few families that try to do it all; then it won't work well. The risk is when we try to make a magic set of parameters or one element that can do many things. Keep each family as simple as possible. The problems come when we try to do too much. One little thing wrong and the program wont even let you load the family, Curtain Wall components are very sensitive.
ReplyDeleteThese things can be done.
Regards
Nardo
Nice Blog. Thanks for sharing it with us. Get the best Curtain Walling in London from the best shutter repair company, ADV Contractors Ltd.
ReplyDeleteCreative ideas are given in this article. Keep share your thoughts with us. Keep on posting articles like these. Now its time to avail aluminum window and door Services in london for more information.
ReplyDelete